Wednesday, 2 November 2016

Blocking without a hat block

A standard dome hat block is one of the most useful tools I can imagine in the millinery world. As much as I love special shapes of block, the dome is unbeatable for versatility and usefulness. But if you are just starting out in millinery or just having a bit of fun with it, even one block is a big investment.

There are hat-making methods other than blocking, like making flat pattern hats from fabric or on a buckram foundation, but blocking really is fabulous. It is fun and creative and opens up all kinds of possibilities.

It is true that if you want to block a hat with a nice round crown that fits closely to your head, like a cloche for example, a hat block is going to be pretty necessary. But there are many other shapes of hats out there, especially when it comes to tilt hats.

I do believe it would be easier to learn how to block straw, felt, sinamay or buckram on a proper hat block first, then start to experiment, but it is not at all necessary. And if you learned on someone else's block, in a class for example, then didn't want to buy your own right away, you should consider some other options.

Let me share with you some examples of my own where I've used alternatives to proper hat blocks.

Found objects


First, random objects totally unrelated to millinery. Once you start looking at objects as possible blocks, it will be hard to stop.

Make sure you consider whether the material of the object can take the pressure of blocking, and how you will hold your blocking material in place. Can you pin into the object? Tie string or rubber bands around it? Blocking felt in particular can take a lot of force, so fragility is a consideration. Also how susceptible might it be to steam or moisture, and how well can you cover it (usually with plastic wrap) to protect it?


I did block this felt on a glass vase, it's true. In hindsight I am not sure I would try that again. I used string to hold the rings in place around the bumps of the vase, and everything turned out alright. In my defence, it is a very sturdy vase.


This one was, I believe, a flower pot. But I'm not sure. It could have been a cookie tin. Much sturdier than glass, anyway. Since I couldn't use pins here either, rubber bands held the shape in place.


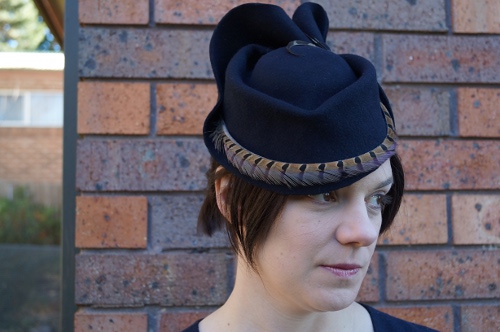
Not that you can see much of the shape here under the fluff, but the foundation for this hat was blocked on a large wooden bowl. I was able to use pins, which is good because the size might have made elastic more tricky to use. I always keep an eye out in op shops for wooden serving dishes and other bits and pieces. I have a lovely little pineapple blocked and waiting to be finished!

Photograph courtesy of @anneliesvanoverbeek

For this reproduction of a hat from Funny Face, the crown was blocked on a shape I made out of cardboard. I originally had the cardboard over a flower pot for added strength, but as I worked and changed the size, it became a cardboard-only block. Since the straw is a very good quality and blocks easily, the strength was still enough.


The tilt hat in my Nora Finds collaboration collection, was blocked on an improvised combination of two small wooden objects. I think one of them was the turned wooden lid of a glass jar, and one was the base of some kind of stand. I placed them together the way I wanted and wrapped them up tight in aluminium foil. With the freehand swirling on top, the exact shape didn't matter too much, but it gave me the right base I was trying to achieve.

Home-made hat blocks


I was lucky enough at one point to have some round hat blocks turned for me on a lathe, but you don't need access to those skills or tools to create a hat block. If you do have some woodworking tools available, simple cut-out shapes using a band saw or similar are very easy. I made my round and heart-shaped pillbox blocks using a band saw and some scrap wood.


Pillbox shapes are a great one to make yourself, and such a useful block to have as well. You can achieve the same result (at least with fabric covered hats) using a flat pattern, but this is quicker, as well as allowing you to work with felt too.


Both styles of pillbox have been used many times by me!


There are also options for carving blocks out of foam (I have done a class on this but haven't tried it since and I know it has to be the right type of foam) and I'm sure many more possibilities. Not all of these are going to last as long, and possibly aren't ideal choices for a beginner anyway!

Augmented hat blocks


So technically this isn't without a block, but I have also heard beginner milliner's with only a dome block complaining of needing more shapes and more options. I can't fault anyone for coveting more blocks, but there is so much more you can do with the ones you have!


I added a small sweets tin to the top of a dome to create this felt hat. I covered the hat block, taped on the tin, and covered both together, then blocked. Easy peasy!


The block for this cone hat (made for the lovely Kate at Retro Rover) was technically built from cardboard, but I did use a sloped brim block beneath it to add strength. I'm not sure if that was necessary, so this could potentially be one you could do from scratch. Keep in mind, though, that the right materials are key. Stretching a normal capeline to this shape may have been a nightmare, but I got advice from my supplier and used a buntal mat instead, which has a less rounded shape. It was perfect and a dream to work with.

If you've been on the fence about trying blocking, or putting off getting back into it because of the cost, consider seeing what else you have around the house, or can find cheaply, that could make a nice little hat shape.

Did any of these examples surprise you? I like to think they hide their secrets well!
SHARE:

Tuesday, 23 June 2015

Winter Felts and a Vintage Hat Block Addiction

I know that my northern hemisphere friends are enjoying their summer, but here winter is really kicking in. Our fire has been going for months already, and the ground has been frosty many mornings. Consequently, I am going to share some wintry hats today!


The first is one that I made for myself. Today's top tip: don't let anyone else model a hat you made for yourself.


Because of the size (it is quite large) I started off wearing this angled to one side, as shown here. I quite like it this way, but for everyday wear I've now started wearing it on the back of my head.


The beret, and the hat shown below, are both formed on vintage hat blocks I picked up via Ebay last year. As much as I love free-shaping felt hats to my own whim, I have a serious weakness for the cool shapes of old blocks. It is so ridiculously hard to not buy them all. *sigh*


The only downside is not knowing exactly how they were intended to be worn or trimmed. While the beret is fairly straightforward, I wasn't sure about this swirly one at all.


In the end, I just block it and experiment. I'm pretty happy with how this one ended up, and I think it suits Lucy really well.


As you can see, my love of felt feathers is still going strong!


This green and black cloche is one I made last year and finally gave a proper photoshoot outing.


This one, like many of my hats, had me filled with doubt until I saw it worn properly and looking fabulous on a beautiful model.


These last two (and some others from the same blocks) are all currently in The Blackheath Hub, the local bricks-and-mortar that stocks my hats. Meanwhile, the beret is getting a good workout in my own daily wear.


Hat blocks like these are works of art. I just love looking at them! But I'm not going to allow myself to purchase any more until I've blocked more on the ones I own. I have a few others (vintage and new) that I'm only just starting to experiment with!


What's the vintage item or crafting supply that tempts you the most? Do you resist or just go crazy once in a while?
SHARE:

Tuesday, 30 December 2014

Vintage Secret Santa (and Santa in general)

The glow of Christmas is lingering in my house, and the piles of lovely presents I received remain under the Christmas tree, reminding me how spoiled I am and of all the exciting things I have to explore and enjoy. I want to share just some of the fun things that came my way this year, for Christmas and my birthday the week before.

Firstly, there was the "Vintage Secret Santa" organised by Jessica of Chronically Vintage. What a fantastic idea and an amazing amount of fun. I'm feeling a little guilty because I'm not sure my present has arrived yet (or at least, she hasn't posted anything about it on instagram). My present arrived from Norway on Christmas Eve, which was an exciting moment, additionally so because I discovered that my gifter was also a participant in the Sisterhood of the Travelling Hat!


My little gift box included an adorable dog brooch, book on Edward Munch, photo frame, bangles, and a Christmas embroidery. I loved that it was not only vintage-themed, but included some specifically Norwegian things to make it feel even more like being a part of some fun global club.

I am eagerly looking forward to next year, if it happens again! I wish there were a few or I could enter multiple times.

For my birthday, I got a new hat block from my lovely husband. It's a cocktail top hat block from Blocks By Design. The brim actually goes up the other way on the hat, it just sits better this way around on a table. I'm looking forward to showing you the results of this!


I seem to have ended up getting a lot of books this year, which is awesome. (Old Hat, New Hat, was actually a present for the little girl, but I'm enjoying it more than her so far.)


My grandmother gave us all a copy of the Gallipoli book because she provided information that is included, mostly quotes from her grandfather's diary (my great-great-grandfather). He was a prolific and entertaining writer, and being a Chaplain and keen amateur historian/archeologist, saw the war experience in an interesting and unusual light at times.


I've been wooed by all the images of Erstwilder brooches on blogs and instagram lately, so when my Dad asked for present suggestions at the last minute, I mentioned them. As it turns out, there is a stockist in the mountains, and he bought me this cute cat! Yay!


My sister included a fat quarter bundle in my "stocking presents". How cute is this lady with her hat-box luggage? I think it would make a sweet lining on a hat.


This is actually another present for my baby daughter, for her to grow into. 3 pairs of vintage gloves in various child sizes.


It's hard to show the detail of the black ones, the first set that will fit, although we will still be waiting a long time for that! It will be worth it!


My Mum has been stalking her local auction house all year for potential presents for us, and consequently got some quirky and fabulous finds!


A large collection of vintage hat pins, in a storage roll she made to hold them. The idea is that I can give the cute ones away when I sell a hat that needs them. So thanks to my Mum, you may get a bonus if you buy a hat from me!

When I opened this next one, I knew there had to be a story behind it.


These three tiny hat on their miniature hat stands, as it turns out, were part of a doll's house haberdasher's shop. She put on a bid that she considered to be very low, but obviously there wasn't much interest, and she got it. She sent me the hats and my sister the counter. Here are the photos of the complete item before she sent it, and the dolls that go with it.


Adorable, right? There is actually a spare hat stand, so I may have to make my own tiny hat to complete the set. What kind should I make?

Edited to add: My sister gave me permission to share this picture, so I can show you a vintage gift I gave, too. This vintage coat and hat, possibly 1940s (but who even cares, look at him!!), and also a yellow corduroy waistcoat underneath. What a darling! "The smartest dressed man I've ever seen," to quote his great-grandmother.

SHARE:

Monday, 18 November 2013

Handmade Hat Blocks

I started by playing with some scrap wood in the workshop myself. Just simple pillbox shapes with a uniform cross-section. Things I could cut on the bandsaw and sand and use right away. I made a simple cylinder that I used to block the black pillbox with the veil circle. I made a heart shape and blocked this little pillbox that I've yet to finish. It's wrapped in blue veiling but I don't know what else to add.


Feeling pretty pleased with myself, I asked one of the TAS teachers if he could teach me to use a wood lathe so I could make some more blocks. I thought I'd like to have a nice button fascinator.

After talking through some ideas and showing him some pictures he came to me with a bag. "I made a set of these in the smallest dimensions. Is this what you wanted? And just one stand, but I can make more."

A week later it was "I made some more in the larger sizes. And a bigger stand. Just let me know what else you want. Wider? Taller? More stands?"

My block collection has multiplied a lot in the last few weeks. Especially if you don't count sugar bowls.


 Look at all those beautiful shapes!


I even changed my calendar to the correct month for these photos. How is it November already?


The stand in the photo above used to be a school desk. They are all made from scrap, including desks and chair legs.


The stand comes apart too, so you can hold the block either free in your hand, or with one part of the stand like a handle, or on the stand on the table.

A bored woodwork teacher is a milliner's best friend.

And while we're on the subject of generosity, I was also given two lots of vintage trim (one silk and one cotton) by Dan, the leatherworker who is a part of Wattle Flat Crafts with me.


I know some lovely people!
SHARE:
Blogger Template Created by pipdig