Tuesday, 8 December 2015

"Squirrel and Oak" Whimsy Design for December

Back in August, when I made the Scottie Dog whimsy, I asked for suggestions of other animals that would be cute on the veil of a design. Kate-Em suggested squirrels, paired with acorns, and I just loved the idea. I had been contemplating acorns on a whimsy for a while, and squirrels were the perfect complement as well as being an animal I love.


There are just a few squirrels running around the bottom of the veil, and one sitting at the top near the cluster of leaves and acorns.


My acorns were inspired by some amazing ones my sister made in an embroidery class. I was going to show you a picture of this inspiration, except that it would look like one of those "Saw it on Pinterest. Nailed it." memes and my pride is too sensitive. Still, I think my method was likely quicker, and it was fun to make. Anything that involves blocking felt over beads has got to be good. It felt like I was making the world's tiniest hats.


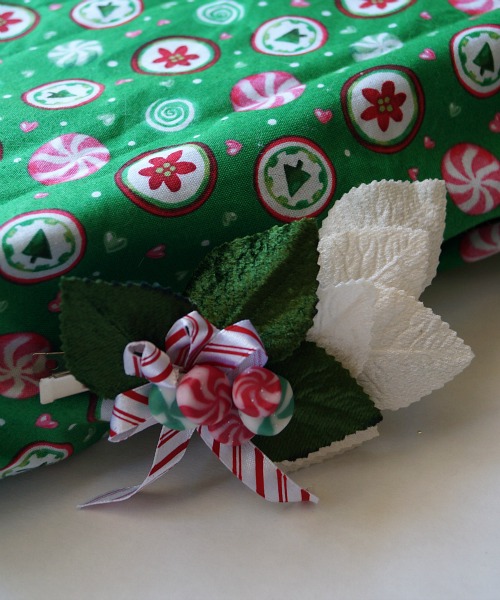
 It has ended up very autumnal, which I like, even it is currently Autumn in zero places in the world.


My lovely friend Ruanne, who you have seen model for me many times in the past, came up to the mountains with her family for a picnic in the park combined with a modelling session. I'm sure I've said it before, but I have the best friends!


Now I've done something tricky with this whimsy, which I've been planning to do for a while, but I hadn't quite worked out how to make it work. While whimsies are fun and very glamorous, they aren't necessarily something for everyday. So I made this one a bit more versatile.


Ta-da! The top part is a clip that can be removed and worn separately, for when a veil is just too much. Or you aren't in the mood for squirrels? Is that possible?


We also shot some other pieces, including the Christmas mistletoe whimsy, which I had only briefly shown you along with the Mistletoe Brooch tutorial.


It matches so beautifully with this blouse, which Ruanne made herself (from the Sencha by Collette Patterns, I believe).


Working out what type of hat wearer she is. We decided on "The Sophisticated Young Married or Businesswoman".


All of which brings us to the conclusion of the Bring Back the Whimsy series!

Bumblebees, Whimsy Tutorial, Choc Chip, Autumn Leaves, Leopard Print is a Neutral, Strawberry Blossoms, Ladybugs, Scottie, Bridal Whimsy, Candy Corn, Mistletoe, Squirrel and Oak.

Looking at them all together makes me feel pretty pleased with myself! I had such a great time exploring fun novelty themes, trying out new trim ideas and techniques, getting reacquainted with fimo, cutting shapes out of felt, working out how to make bees, and playing with veiling. I'm looking forward to bringing some of these themes and techniques into future hats and hair accessories too.

Thank you all for joining me on my year of whimsies. I hope you had fun and maybe even made yourself a whimsy following the tutorial.

Do you have a favourite from the series? I would have a hard time picking one myself!
SHARE:

Tuesday, 24 November 2015

Christmas hats, hair flowers, clips and combs

I haven't shared a lot in the way of small hair clips or flowers on the blog, and to be honest they are not exactly my main priority. But they are fun and I wear them occasionally myself, and make some for my bricks-and-mortar shops and markets (ok, market, singular).

This year I really wanted to make some Christmas items, and although I had a lot of grand ideas that will perhaps one day come to fruition, it was more realistic to make some smaller items. I had a lot of fun with these.


Since Christmas is approaching at a rapid pace, I wanted to get these done and into the shops by mid November. This rush meant, however, that I didn't yet have a model lined up, so for the first time I did a no-model photoshoot. As well as Edie and my other trusty mannequins, I relied on themed props.

www.etsy.com/au/listing/257560642/christmas-gingerbread-man-hair-flower

It was heaps of fun! And I found a LOT of Christmas crap without having to actually get any boxes out of the shed. I'm a little surprised, but I shouldn't be. And also I'm a little proud.

www.etsy.com/au/listing/257459423/peppermint-swirl-christmas-candy-hair

Product photography advice seems generally to be geared towards smaller items. People are always telling you to build your own little light box and set up white background and use a bit of a table and props and I always think "Do you realise how big a hat with a pheasant feather is?" Nevertheless, the information was sitting around in my brain and I finally got to use it!

www.etsy.com/au/listing/257562066/mistletoe-a-christmas-vintage-style

Although don't you hate it when you look at the photos afterwards and realise something wasn't sitting flat and it's that way in EVERY photo?


I still have a long way to go with photography and so much to learn, but I enjoy it immensely and love it when a photo turns out just right. I'd love to get from "not bad" to "actually quite good" one day.

www.etsy.com/au/listing/257564462/winter-themed-miniature-top-hat-in-grey

This is actually an older piece, from my "make all the miniature top hats" phase, but I still really like it and thought that Christmas was a good time to list it!

www.etsy.com/au/listing/257560642/christmas-gingerbread-man-hair-flower

I'm still hoping to squeeze in a modelling session but until then, these will have to do. For the ones that are listed on Etsy, the photos link to the listing. The others will probably be going into bricks-and-mortar shops soon.
SHARE:

Wednesday, 11 November 2015

Christmas Felt Mistletoe Brooch (or Hat Pin) Tutorial

When making my mistletoe whimsy, I was really enjoying playing with felt mistletoe, so I decided to also make a brooch version that could also be worn as seasonal trim on a hat.
Mistletoe Brooch or hat Pin Tutorial by Tanith Rowan

So let's get into it. You will need:

  • Green felt, approx. 10m by 10cm, can be in smaller scraps (I used 100% wool, 1mm thick)
  • White felt, a small scrap of a few square cm (I used some hand-felted wool from a friend, about 1-2mm thick but varied)
  • Red ribbon, approx. 15cm long (mine is gold-edged, 1cm wide, some kind of cheap craft ribbon from my stash)
  • Matching threads
  • Needle
  • Brooch clasp
  • Sharp scissors

Skills required

  • Hand stitching. You don't need any particular "stitch", you are just going back and forth through the materials to hold them in place, but you need to be able to thread a needle and tie a knot in the end and so on. (Having said all that, you can just use glue if you like!
  • Um...that's it!
Mistletoe Brooch or hat Pin Tutorial by Tanith Rowan

(Let me explain right here about my background colour. I wanted a solid background but not white, so that the white felt would show up. I used this fuchsia pink felt, but its colour showed up totally differently in different photos! Oops!)

Cut out your mistletoe leaves. Here is a picture of mine. I cut freehand based on looking up images of mistletoe. I had to make sure I searched for real mistletoe, since a lot of results were clip art and illustrations, and a lot were also actually holly!

Mistletoe Brooch or hat Pin Tutorial by Tanith Rowan

But if you aren't confident at that, fear not! I turned mine into a pattern for you. Literally. I turned that image into a pattern rather than drawing one. I'm not sure if that's lazy or efficient. Print this out at approximately one quarter of an A4 page. Cut each shape out. I recommend tracing around with an erasable pen as the easiest way, then cutting out. This also allows you to get an efficient layout on your felt.

Mistletoe Brooch or hat Pin Tutorial by Tanith Rowan

Thread your needle with green thread and knot the end.

That big piece is your base. Layer the others on top and sew them on, using a couple of stitches through the top of each one. Add the bigger pieces first, then the smaller ones on top.

Mistletoe Brooch or hat Pin Tutorial by Tanith Rowan

Cut out 8 small circles from the white felt. If they don't look round enough, rub them around between your fingers a bit as well. Place them on your mistletoe in pairs, with each pair located at the top of a pair of leaves. Thread your needle with white thread and knot the end.

Mistletoe Brooch or hat Pin Tutorial by Tanith Rowan

Stitch the berries on using the white thread and a stitch or two per berry. Start and finish the thread again for each pair so you don't have a long stitch between them at the back.

Take your ribbon and cut into a longer and shorter length (about 10cm and 5cm). Cut the longer piece on an angle at each end. Thread your needle with red thread and knot the end.

Mistletoe Brooch or hat Pin Tutorial by Tanith Rowan

Fold the longer piece into two loops and two ends, the loops and ends of the bow.


Stitch these folds in place with a few stitches.

Take the shorter piece and wrap it around the centre of your bow, and stitch that in place at the back of the bow.

Stitch the bow to the top of your bunch of mistletoe.

Mistletoe Brooch or hat Pin Tutorial by Tanith Rowan

Turn your brooch over. Thread your needle again (I used green but it doesn't really matter for this part) and get your brooch clasp. Sew the clasp on to the upper central part of your felt.

Mistletoe Brooch or hat Pin Tutorial by Tanith Rowan

Clip your brooch on! Wear it as a brooch or trim a hat with it. Or a bag! Or...whatever!

Mistletoe Brooch or hat Pin Tutorial by Tanith Rowan

Suggested variations:

  • Use small white beads instead of felt for the berries
  • Add a tiny bell! I collect the ones from Lindt bunnies and so on, so I have them on hand for crafts
  • Use an alligator clip instead and pin straight into your hair
  • Make a cute felt bow instead using thin red felt
  • Change it up completely by cutting holly leaves instead and making red berries


I know that some people like Christmas preparations to wait until closer to the day itself, but I'm not one of them. There have been a lot of Christmas songs playing around here, and it honestly has put me in the best mood! (And it inspires my Christmas creating too)

I hope you enjoyed the tutorial. If you use it, I'd love to see what you make :)
SHARE:

Tuesday, 6 October 2015

"Candy Corn" - a Halloween Whimsy Design for October

For my October whimsy, I've naturally turned to Halloween for inspiration.
 
Since I already made some whimsies last Halloween, with shadowy birds, dripping blood and skeleton hands, I felt drawn to something a bit lighter.


Thanks to a brainstorming session with my friend Sarah, we have a candy corn whimsy!


Complete with candy-corn-coloured flower and velvet leaves, handmade candy corn pieces and a light peach-coloured veil.


I took the photoshoot as an opportunity to bring out some of my favourite old Halloween decorations.


These particular items have been around since I was a kid. I remember the year we got Jack, with his squishy funny face. I think there was a whole collection, although we only had one. Does anyone else remember these or did anyone have one?


He's a bit worse for wear now, particularly from some conflicts with cat claws.


But still loveable. I'm not sure how he makes that face though. I gave this some serious effort and quite a few attempts.


He likes feeling pretty, although he doesn't want to admit it.


Anyway...another thing I've been meaning to do is show an alternative way to wear a whimsy. My understanding is that the true-to-vintage way is with the flower (or other main decoration) at the top and centre of the head, with the veil coming down to just below the eyes or nose.


If you prefer though, I think this looks great with the flower to the side, an the veil arranged over the head from there. Depending on the exact position, you can have the veil fall where you like, even just over your hair if you aren't sure about face veils.


I love that one. It makes me look like I have a crazy nose (while conveniently hiding my actual nose!).


This whimsy is up in my Etsy shop (as are two of last years designs), and ready to ship!

Halloween lovers, how do you like your decorations and outfits? Fun, whimsical and bright, or dark and ominous? (Or a bit of both!)
SHARE:

Thursday, 24 September 2015

A Bridal Whimsy for Spring

For this month's design in my collection of whimsies, I wanted to try my hand at a bridal whimsy, and here it is.


Here in Australia, Spring is bursting into life, and the occasional day is starting to be really warm. Lots of Spring blossoms are out, and wedding season is well and truly beginning.


It isn't surprising that September seemed like the perfect month to do a bridal design, because it was in September, three years ago, that I had my own wedding.


As I've mentioned before, I don't much care for modelling my own creations if I can avoid it, and I certainly didn't feel like doing my make-up and hair to a bridal standard (ok, I'm not actually even capable of doing that), so I've done something different for these photos, and used some props, including my own wedding shoes, my wedding and engagement rings, and a little bunch of flowers. If someone had to make their bridal bouquet from my back garden, this is what they might come up with!


I'm certainly not a bridal photographer, but I had fun doing these.


Bridal millinery is something I would like to pursue more, but haven't yet devoted much time too. I am extremely proud of the custom headpiece I made for Mel's wedding, last year, and I have a lot of design ideas in my head. So perhaps you will see more in the near future!


I was a bit uncertain about adding the green silk leaves, rather than sticking to a completely white/ivory palette, but I quite like it. What do you think about a bit of colour in bridal designs?
SHARE:

Tuesday, 25 August 2015

"Scottie" - Tartan and Scottish Terrier Whimsy Design for August

My inspiration for this month's whimsy comes from one of the fluffiest and most adorable breeds of little pup, the Scottish Terrier.

Scottie Dog vintage style whimsy veil hat

I haven't been in a dog-owning household since we left our golden retrievers behind in America, when I was seven years old. They were bigger than me, and could bowl me over completely, but I don't think that bothered me at all.

Scottie Dog vintage style whimsy veil hat

Despite being more of a cat-lover, when it comes to my personal pet preference, I do love dogs too. And I have always liked Scotties. In fact, a very scribbly fluffy Scottie was the main character in a little comic strip I (very) briefly drew when I was about 11 years old.

Scottie Dog vintage style whimsy veil hat

Strangely, in all my brainstorms of possible whimsy themes, I hadn't considered Scottie dogs, but once the idea was in my brain, I couldn't make it fast enough. And I knew I had this ribbon, with the Black Watch tartan pattern, in my ribbon box, just waiting for an opportunity like this.

Scottie Dog vintage style whimsy veil hat

Mel's Maltese puppy doesn't seem to mind posing with a whimsy featuring a different dog, which just goes to show you that dogs have a less jealous temperament than cats. I'm sure cats would object to such scandalous ideas.

Scottie Dog vintage style whimsy veil hat

The felt dogs are cut out freehand, so they are all a bit different!

Scottie Dog vintage style whimsy veil hat


A nice addition to the year of whimsies collection, I think.
 
Are there any other animals that you think should grace the veil of a whimsy?
SHARE:
Blogger Template Created by pipdig