Friday 28 February 2014

My small but growing hat pin collection

Remember my great-grandmother Dora? I shared some gorgeous pictures of her and her family and showed you the 1920s beaded pieces I am lucky enough to have that belonged to her (or possibly her mother).

Dora collected hat pins (among other things). Once I started making hats, my mother and grandmother would say what a shame it was that the collection didn't come to our side of the family, and I too wish that it had. Of course I am blessed to have as much lovely old family stuff as I do, and I try to remember that and enjoy these things.

You can't help indulging in a bit of wistful and wishful thinking though, and this has grown in me a fascination with hat pins. I plan to learn some jewellery making skills and make my own, but so far that hasn't happened, and instead I am starting to buy a small collection.

First, I bought a pin off ebay. I don't even think it is a hat pin, but some other-purposed pin, since it is so small (about 2 inches long). This was one of my big regret impulse online purchases (there's been a few), and I gave up on the hat pin idea for a while.


Then I went to lunch before Christmas with a very dear friend from work and got to meet her family. It was a bit of a "While You Were Sleeping" family event. (In my family, whenever a conversation is getting confused and going off in multiple and/or odd directions, you can say "These mashed potatoes are so creamy" and that sums it up!) If you aren't familar with the movie, what I mean is that I felt instantly welcomed into this warm and loving family, but it was also a bit crazy. In a good way. And I was given (given!) two family hat pins by my friend's lovely mother. Belonging, if I remember correctly, to her grandmother and great-grandmother.

One, by the length, I would say is Edwardian or Victorian, made to go through a large wide hat over some large wide hair.


The other is an interesting textile and metal combination, with a much shorter pin. I would guess at 1920s, but I'm not sure. In fact, I'm pretty clueless about hat pin eras, so I won't even guess for the rest.


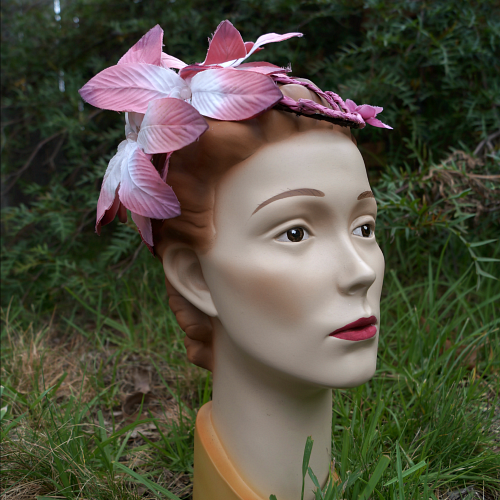
So by this point I was starting to get hooked. At the trade show for the International Millinery Forum I saw a few vintage hat pins. There were a few I liked, but this one in particular had an unusual design that really appealed to me.


I cautiously asked how much, and was told $2! Mine! And some more thank you very much!


Finally, the latest addition, at $4 from an adorable little "Old Wares" shop on an otherwise-residential street corner in one of the suburbs surrounding Wollongong.


They are all a bit damaged, but so cute and charming. What do you think? Which is your favourite?
SHARE:

Tuesday 25 February 2014

Another Straw Hat Makeover

This time I didn't visit an op-shop for a hat in need of a refashion, but my grandmother Wendy's house. Wendy has a wall covered with old straw hats, many of which she was given by a friend who was trying to get rid of them. They are all very dusty, and a lot of them are pretty battered.

Like the target of today's makeover.


To be fair, the main problems with this hat were dust and being crumpled, both of which would be quick fixes. But under that band lurked secret issues.


This string has been threaded through the straw and left some pretty daunting holes and marks.

So I knew what I wanted: to get rid of the bottom section of the sideband, but keep the nice open woven section just above. Checking what Wendy wanted gave us a vision: something to wear to the shops and out for lunch.

We cut and washed and re-shaped and edged and wired and experimented and tried on until we had something new and fun.


I admit it has some similarities to my last straw hat refashion, and a somewhat 1940s feel again. I must I have some neural paths in my brain that point straight from straw hat to 1940s.


I picked out a range of petals from my boxes of taken-apart-and-washed flowers, keeping to a pink-red-peach-orange sort of colour scheme and tucked the reassembled flowers into all the folds. Somewhat like this one I'd seen floating around Pinterest a few times.


I love knowing I've turned a dust-catching and space-wasting item into something new, exciting and wearable for Wendy.

In other news, it's almost March, which means it is almost sixties time! In case you missed it, I'm talking about the first month in my new blog series "Hats of the Past: a Milliner Explores History".

I am a bit overwhelmed by all the exciting ideas and hats-in-progress, but I have a big week ahead working on finishing everything up as much as possible before the series begins. There is an unusual amount of orange in my craft room!

Also, March will mean the end of the current 25% discount offer for the grand opening of my online shop. Don't forget to use the code TRDopen to get that discount.

I've been slower than I planned in adding new items to the shop, but here are some that have gone up since I opened it.

http://tanithrowandesigns.storenvy.com/products/5633251-red-riding-hood-tudor-style-headdress

This is one of my older hats, a Tudor style French hood inspired by Red Riding Hood. It's still one of my favourites.

http://tanithrowandesigns.storenvy.com/products/5487505-floral-garland

These others have appeared on the blog much more recently. The floral garland and the pink dragonfly hat are both refashions from op-shop purchases.

http://tanithrowandesigns.storenvy.com/products/5445991-pink-dragonfly-hat

Even though I would love to have photos of all my hats on real models, I'm so happy to have my gorgeous display heads for the rest of the time. They are the most instantly-elegant, and the quietest, models I've used and they let me push them around to get the angles I want.

I've discussed the possibility of a new display head design with my talented artist friend, so I'm searching for inspiration images. Do you have any favourite looks for vintage display heads?
SHARE:

Friday 21 February 2014

A Custom Pillbox: from idea to sketch to finished item

Today I'm sharing with you a pillbox I made recently as a custom order, and talking about how the custom design process worked in this case.

We begin with a dress pattern and a plan. My client was making this dress for a special occasion and wanted a hat to go with it.


We had a long back and forth exchanging thoughts and ideas. She sent me some images of vintage hats and fashion illustrations. We talked about why she liked each one, about the event, the colours and fabrics of her dress. From that conversation, we were able to rule out some of the inspiration images as lovely but not right for this occasion and outfit.

Next I sent her some sketches. The first was based on the remaining image she had sent.


I also suggested another style I thought might work. You may recognise that I later made this one anyway, and used it in my Bandeau class at the IMF.


She had also suggested a pillbox, so I also sketched that idea, with the wide ribbon-y loop trim from the first sketch.


This is the one she chose. She posted me some leftover fabric from her dress. The fabric turned out to be very thin, so I reinforced it with interfacing when covering the base, but no amount of pleading would make it fold beautifully into stiff loops! So I tried draping it over wire loops, but it was not a success.

I'm going to show you the terrible reject stage of progress, for the sake of transparency, but don't judge me too harshly! I fixed it!


Yikes, huh?

It wasn't looking like either of us had imagined. So I bought a more suitable fabric to do the loops. The upside of this failed attempt was that somewhere in the draping in put a few strips across the pillbox, and I loved that feature! So I kept it in place in the next round of playing.


That's more like it. This is the pinned-in-place and still-playing version, but it was definitely going where we both wanted it too.

I just had to stitch things in place, neaten up the top bands to lay smoother, and then I added some buttons too.


An elastic and a lining and it was ready to go. Nestled into a cosy pile of tissue paper in a shiny box, with loops of cardboard to support the trim as it travelled.


It's gone off to its new home now! I hope you enjoyed this hat and its creation story.


And of course, if you want to be a part of a story like this, you can contact me about having your own custom hat made. I love making whatever hat I feel like, but it doesn't compare to making a special one for a special person.
SHARE:

Tuesday 18 February 2014

A Weekend of 1920s

Waking up to heavy rain on the day of our 1920s croquet afternoon was dispiriting, but we got dressed up and crossed our fingers. I wore the pink cloche with swirly rosettes.


The rain had eased considerably by afternoon, but an umbrella escort was still the best option for taking your shots, before returning under cover.


This was inconvenient, so in the end I dispensed with my hat and stopped worrying about the rain.


This is all happening at the Blue Mountains Manor House, as part of the Roaring 20s and All That Jazz Festival. I'm ashamed to say this is the first time I've been to the Manor House, even though I walk past it to the train station!


I also made a hat for the lovely Ruanne. She wanted something with a wider brim for the sun (we wish), upturned at the front.


I took the opportunity to keep practising my straw braid skills, and added some of the leftover fabric from her dress (which she made herself).


And for dinner, I swapped to a black felt cloche, and jet in place of pearls. Just a few days earlier I bought a broken necklace, and it makes the perfect sparlky fringe for this hat.


I only got a quick mobile portrait on the night, but here are some more photos of the hat.


One of the things I love about blocking felt is playing with the ends in different ways. It's never the same twice.


I discovered something important this weekend - croquet is fun! I wasn't too terrible at it, either, which makes for a nice change.

Now all we need is our own manor house with a big flat lawn...
SHARE:

Friday 14 February 2014

Pink 1920s Felt Cloche

This year I've joined the "Historical Sew Fortnightly" challenge. I love this kind of challenge. A theme, an idea, a restriction. Something that makes you think in different directions than you otherwise would.

This is actually challenge number 3 for 2014, but I only just decided I would join, so this is my first one. The restriction was simply: Pink.


Although I went on a Pinterest frenzy finding pink hats, in the end my inspiration came from a black-and-white photo I had pinned months earlier. Now I'm paying for my pinning sins because the original source is not forthcoming on this one. But I've found another blog with the photo, it's the last one in this post, with the swirl and the bling.

When I did the single swirl, I wasn't happy with it, so I added some more. I was also a bit tentative about the bling, but I stuck with my source, dug through my op-shop finds, and blinged it up. I think I like it!


The Challenge: Pink 
Fabric: Pink wool felt hood
Pattern: No pattern
Year: 1920s
Notions: Thread. Bling. Glue.
How historically accurate is it? 80-90%
Hours to complete: 3-ish
First worn: Just for photoshoot
Total cost: about $20


One of the aims of the Historical Sew Fortnightly challenges is to promote historical research and accuracy. This one should be pretty good. Felt cloches were pretty popular in the 1920s, and the design is based on an original hat from the era. I assume that the processes for making millinery felt will have evolved a fair bit since the 20s, but I imagine the end product is fairly similar.


Even though the colour was the key element of this challenge, I prefer it (and me) in black-and-white. I promise I haven't edited the hat nearly as much as my face.


I have a 1920s-heavy weekend ahead of me too, so there will be more cloches to show next week! Fingers crossed that the rain eases up enough to play some croquet.
SHARE:

Tuesday 11 February 2014

2014 Blog Series: Hats of the Past

In March, I'll be starting a blog series called "Hats of the Past: a Milliner Explores History."

Each month I'll focus on an era and explore and make some of the hat styles that were popular in that time. I'll be starting at the 1960s and working my way backwards.

Studio portrait 1880s, State Library of Queensland

Here are some of the things you can expect to see:
  • Information about hats and fashions of the era and how they evolved
  • Images, sketches and notes breaking down the styles and construction
  • Collaborations with other bloggers and guest posts by knowledgable people
  • The occasional tutorial and/or pattern
  • Outfits to show off the hats, working them into either vintage styling or a modern look
  • Little detours into other accessories of the time
and most importantly...
  • Lots of hats made by me in the era theme, from accurate reproductions to modern twists, most of which will be available for purchase, while others will be part of competitions and giveaways

Women at the races 1933, State Library of Queensland

Plus, your regular viewing continues!
I will still be posting other things, as my life won't always oblige by aligning itself with the series timeframe.

February is Sixties Month!
I've started a preparatory 1960s Inspirational Pin-a-thon, and I'd love to hear any favourites or suggestions for this era (and any of the future ones too!)

1940s women, State Library of Queensland

What's your favourite era of fashion or millinery?
SHARE:

Friday 7 February 2014

The Online Shop is Open!!

You can now buy my hats online! The gorgeous little "Shop" link on the right hand side will take you there too at any time.


To celebrate the grand opening, and because I have covered my walls with hooks and my shelves with boxes and I need to clear some space, I'm offering my blog readers and FB fans 25% off until the end of February!


These are some of the hats you'll find there currently, and I'll be uploading more hats frequently, so keep checking back.


If you like my hats, and think you might know someone else who would too, please share this with them. It'll make me feel special :)
SHARE:

Tuesday 4 February 2014

A Chewed Straw Hat Makeover

Remember this hat I promised to makeover? The one that MacGyver chewed because he wasn't getting enough attention? It's time has come.


I hadn't tackled this one previously because I hadn't worked much with straw braid before, and I knew I would be taking a course using straw braid at the 2014 IMF. So I waited. And I learned about straw braid. I also got some bonus tips and ideas from the lovely Belinda at Peacock Millinery who had done some amazing refashions with op-shop straw hats. I was inspired.


During the week at Wagga, I politely suggested to Belinda that I might try some of the techniques she used on her straw hats, if she didn't mind. Being the open and generous soul that she is, she said that was fine, and that anyway hats always turn out totally different even if you are trying to achieve something similar.

She was very right. I realised as I started working that I wanted something more everyday-wearable and with a vintage feel, rather than a racing fashion style to it.


The most important idea I got from watching her work was a different mental approach to the material, making me realise how much more I could do with it.


Having said that, it really has ended up quite traditional, but I'll try some more different things in future.


After all, there are plenty of straw hats in the op-shops out there. In fact, I picked up another one just last week. It's already progressing in a different direction. In fact, two different directions!


I've also been tidying and reorganising my crafting space. I've included a new feature that I call The Decision Wall, even though it's a shelf really. Ok, it's the top of two tool shelves.

It's a place for all the half-done pieces that are waiting for something. Usually they are waiting for a decision. What kind of fabric? What kind of trim? Does this trim look any good? Is this enough? Too much? Is it secretly ugly and I'm just too emotionally involved to see it?

I love the decision wall. It's making my neurotic creative process flow much more smoothly!
SHARE:
Blogger Template Created by pipdig