Thursday, 17 May 2018

7 Hat Projects for Recycling Clothes and Using up Scraps

Most hats require smaller quantities of fabric than garments, so they are a great way to use up scrap fabric or refashion garments. After reading Nicole's excellent post on 12 Ways to Recycle Used Clothing and Textiles, I decided to have a think about some specific hat projects that make great scrap-busters and refashion ideas. Here are some of my favourites.

1. A 1954 Butterfly Cap


Intended for velvet or velveteen, and beautiful in those, I have also made this in other fabrics (and intend to again). It takes a small amount of fabric and with clever layout can use multiple smaller scraps. It does require a buckram foundation and wire as well.

I've reviewed and given some tips for this original (and free) 1954 pattern.

2. A 40s-style fabric snood


Whether it's to go with a hat or wear by itself, a snood gives a fun 40s feel to an outfit, and if you can't crochet, you can still make one! Perfect for any fabric with a good drape, super easy to make, and only needing the fabric and a bit of elastic.

All the instructions are here from the Snoodtember Snood-a-long.

3. A classic multi-era beret


My very first beret made with the pattern that would become my Grevillea beret was made from a sleeve of my old favourite coat. Because of the sectioned layout and multiple band width options, you can really make this work out of some odd shaped scraps or old garments. It's great for coats, jackets, and nice trousers as well as project scraps, of course.

You can get the Grevillea beret pattern here.

4. 1939 "Doll's Hat"


Another one for the velvets, but I think it would have a lot of potential in other fabrics, and takes a very small amount to make. It does need wire and buckram for the foundation, but not a lot of those either. The veiling is optional and all sorts of trim could be used.

Read my thoughts on this free vintage pattern.

5. Beach Hat


This one is particularly special because it's intended for regular cotton fabrics, so can use up some cute plain or printed fabrics, and only takes about a fat quarter of material. It's also a really simple pattern, quick to make, and can be decorated for further personalisation.

Another free vintage pattern, I've reviewed and given advice on this beach hat here.

Of course, making a hat from scratch is not the only option. All kinds of trims can be made from small amounts of fabric, and sometimes all a tired hat needs is a little revamp.

6. Retrim an old hat


For this straw hat I've used leftover fabric from a garment sewing project to create the band and the brim binding, and I love the extra colour it adds. In this case the straw was new but the principle applies and it's a great way to freshen up an older and plain hat. Similarly, it's easy to add fabric bows and other special touches, with pretty small amounts of material.

7. Fabric flowers (also ribbon flowers)


While French flower making is pretty complex and requires special (and expensive) tools, there are plenty of quicker and easier ways to make flowers. Ribbon flowers have whole books written on them, and ideas for both ribbon and fabric flowers appear in vintage publications quite often (not always with good instructions though!).

There are many more great hat projects out there for recycling fabrics and using up small scraps (see the rest of the patterns in the Trove Pattern Project as a starting point) but these are some of my favourites.

Have any of these sparked your imagination? Are there any other hat projects you have tried for using fabric scraps or recycling clothes?

To keep up with hat-making tips and millinery information, sign up for the email newsletter here.
SHARE:

Thursday, 1 March 2018

Tutorial: Adding felt appliqué birds to your Grevillea Beret

Today I'm sharing the pattern and instructions for adding some birds to your Grevillea Beret using felt. As you know, I love felt, I love berets, and I love birds on hats, (I really love birds on hats.) so it's about time to combine all three!


You will need:

Your Grevillea Beret pattern and all the usual material and tool requirements for it*
Thin felt (1mm thickness is good, and I prefer 100% wool)
Embroidery floss to match your felt
Appliqué birds pattern, printed out

*Look obviously you could use a different pattern or appliqué onto a beret you already own, but let's not dwell on that idea too long.


Cutting out your birds:

I printed my pattern on to regular paper, cut the pattern pieces out, traced around them with an air-disappearing pen and cut the pieces from the felt. I found this to be OK, but it did require some trimming afterwards to smooth out some bits. I think a better method would be using freezer paper, although I know it's not as easy to find in Australia.


Note: the birds have very narrow sections on the tails that pull apart easily. Handle the pieces very carefully. You may even want to consider cutting them wider at first and trimming just before you sew.

Sewing the birds on:

As you are working through construction of your beret, you want to add the appliqué at the point where your crown is complete, but before you add lining (if you aren't adding a lining you could add an appliqué at any point).

Put your beret crown on a mannequin (or your own head, but that's a bit trickier), folding under the seam allowance. Pin your felt shapes in place and rearrange them until you are happy with the layout.

Sew your felt shapes in place one by one using two strands of embroidery floss. I used a whipstitch, following this video tutorial by Wendi Gratz. Others suggested blanket stitch, so I would recommend looking at both and deciding which you prefer. I liked the simple option and it seems to have worked well.


Note: that advice above about the tails? I was not so good at following it myself. I lost two tail ends, so as I stitched the pieces on I had to do a little bit of extra embroidery to replace them. It looks OK from a distance and it's a good way to recover the situation, but I'd recommend trying to avoid the problem instead!

Once your birds are on, proceed to add the lining and the headband and finish off your beret.


My husband wasn't sure about the black and white, and I think in hindsight I agree, but it does make for good contrast images. I'd like maybe navy with pale grey birds. What colours can you see it in?
SHARE:

Wednesday, 10 August 2016

Trove Pattern Project: 1934 "Vagabond Beret"

Today the Trove Pattern Project delves further back into 1930s fashion with this so-called "Vagabond" beret. This free pattern appeared in the Sydney Morning Herald on March 1st, 1934, and was by "Elissa".

 
Berets are a fabulous and useful hat, and the illustration looked very promising.


I'm pleased with the results and I might even actually wear this hat. I haven't often used stitching as a design element on hats, especially not anything as simple as straight lines, but I really like the effect (even though it is very subtle on my fabric). I haven't completely decided if I like the buttons yet.


Like most of these patterns, the instructions are brief and require you to make quite a few educated guesses along the way, but I've included mine here to help you.

Note: These are not full instructions, read through the original pattern and instructions for the rest of the information.


Materials:
  • Half a yard of fabric. Recommended in black velvet, but it also says at the end that it could be made in "tweed or face cloth to match the coat or frock." I've used a cotton/wool blend leftover from making, appropriately, a 1930s style top. I'm a big fan of wool for berets, and it's less formal than velvet.
  • Half a yard of stiffened millinery net. I don't actually know what they are after here. You can get blocking net, and I think it is similar to the kind used in the 50s and 60s, but the 30s? I'm not sure if it is the same thing. It gets cut out in the same pattern piece for the top and sewn flat, so it is basically interfacing to provide more body. So I just used interfacing, a medium weight iron-on, because that is what I had already and it suited my fabric quite well. I actually used it on both pieces, because my fabric is very drapey otherwise, but I think the original is only using the net on the top piece.
  • The trim they show, that I've also used, is an "embroidered" pattern and two metal buttons. They also suggest feathers or a ribbon bow as alternatives.
  • They recommend buying a ready-made lining. Not as easy to find as they used to be, but I did find some online at Torb & Reiner and also Hatters Millinery Supplies. There are also instructions online for making simple hat linings. You can use the original pattern to make a lining (which is what I would usually do for a flat pattern hat) but because the top is stitched down it won't work as well in this design.

Pattern:
  • The size worked out perfectly for my head, which is about 57cm, when I assumed a 1cm seam allowance was included on the pattern.
  • A bit of guesswork is required to draft it, but the key measurements are given. This is how I drew up the pattern for the side band:
  1. Draw a rectangle 23.5 inches long and 10 inches wide.
  2. Find the centre of both long sides, and join them.
  3. Measure 4.5 inches along this line from the top and mark this point.
  4. We know the bottom edges are 3 inches long but not the angle they are at, so I guessed. I measured 1.5 inches (I think. Maybe it was 1.25) up from the bottom corners then drew my 3 inch lines from there.
  5. Sketch in the curves as smoothly as possible.
  • I didn't take a photo of all that, but here's a quick diagram for you: 
  
Sewing:
  • Attach the interfacing/net/whatever to the fabric. So I just had to iron my interfacing on. The original instructions have you tacking the net to the fabric for the top piece, and the decorative stitches are a part of this, so you don't really have to do extra tacking, just line them up and go on to the next step.
  • Sew the decorative stitching on. The original says with "silk", I used regular sewing thread. I imagine embroidery thread would be more appropriate. Mine doesn't show very well because of the dappled fabric but on the plus side it had straight lines I could follow!
  • One tip for the stitching - draw on the seam line and don't stitch beyond this. I stitched closer to the edge in some parts and then later when I trimmed my seam allowance, some of my stitches came loose. You could also choose to stitch that seam with a narrower seam allowance.
  • I then pressed the piece with steam because my stitching had made the fabric wrinkle a bit.
  • Assemble the hat. Again, I used a 1 cm seam allowance as it wasn't stated but that amount would give me the correct fit. I trimmed the seam allowance where the top and side joined to about 5 mm so it would sit nicely.
  • The instructions say to "Turn in the lower edge until the beret is shallow enough." *sigh* I turned it up about 1.5 cm, and then hand stitched it into place.
  • The seam on the side band in this hat sits on the right of the head. (At least, I think that is what they are saying.) Try the hat on, pull the top forward and down until you like it, then pin into place and slip stitch down. This seemed a bit vague but when you have the hat on it does make sense. Looking at the original illustration helps.
  • Add your buttons and a lining. I haven't lined mine yet. I'm going to decide how I feel about the buttons first.
  
Wearing:
  • There isn't much to the wearing of this hat, as it should fit your head, and the rest is all just deciding how much of an angle you want. How jaunty are you feeling today? 

I might even like this enough to try it in another fabric, but on the other hand, many more patterns are calling me.

What do you guys think of this one?

If you've missed any of the other pattern reviews in my Trove Pattern Project, you can find them here:
SHARE:

Thursday, 9 June 2016

Berets, Wales, and cutting into the good fabric

As you might remember from her part in the Sisterhood of the Travelling Hat, my Mum lives in Wales, and I mentioned in an earlier post that I would be visiting her this year. Well, we have been, returned, recovered from jet lag, and fumbled our way back into our regular routines.


It was Spring, and a not unpleasant mix of cold and sunshine, with a generous sprinkling of lambs, daffodils, and blossoming cherry and pear trees.


Teacup had what might be the time of her relatively short life so far, learning to water plants, eating oregano straight off the plant, picking all the daisies she could find, playing with cats, and so on.


My husband and I pursued our separate interests while he was there, with him mostly launching himself at high speeds down things, like mountains, white water and zip lines, and me mostly enjoying scones. We only visited one castle, Dolwyddelan, which was on the way to Blaneau Ffestiniog, where he had a date with an underground zip line. Still, the castle was cold and windy, and there are at least five ways you can injure yourself on it, apparently, so I guess everyone was happy!


Rather than overdose you all with holiday snaps (not that I took that many, actually, as I was having too much fun relaxing and enjoying things and only occasionally remembering to pick up my camera), I'm mixing it up with some hats. On a theme though!


When I last visited, almost three years ago now, we discovered the Trefriw Woollen Mills, and I came home with three short pieces of gorgeous wool tweed. Which sat around waiting for me to have a design worthy of them. Which had to be very good, because this was lovely, expensive stuff, as well as being meaningful to me, and not something I could just pop over and get some more of any time I wanted.

Except that the years rolled on and I had actually popped over to Wales again before I had cut into two of the three colours (I made some of the brown into the "small chic beret"). So I decided that one of the first things I would make when I returned, would be a beret with one of my Welsh tweeds.


I don't feel the photos do the variegated colour of this fabric justice, and I'm still deciding how I feel about my beret pattern, but I'm glad I've used at least some of the good fabric. And I did buy more!


Berets have been one of the themes of my winter restock at The Blackheath Hub, and I'm happy to say (relieved, really) that they are all from fabric I had in my collection already. Because I really don't need to be buying more fabric! Using up this snow leopard faux fur is one of the great ongoing missions of my life, having some time in my youth decided to buy three metres of it. Hmmm. It's lovely, but it sure takes up a lot of space.


I love berets, and my own red one is a go-to everyday hat for me. This hounds-tooth below is also from an old coat, one that I picked up in an op-shop. You can't go too wrong with black and white, or with hounds-tooth wool.


I made a mix of the classic "French" circular berets and ones with a 6-panel crown. I think in general I prefer the sectioned crown, but it certainly wouldn't work for the faux fur! I tried the cheetah print in both. That's another one that has been lounging in my craft room for many years, having appeared before as a 1960s style hat. I've almost finished with that fabric and I'm thinking cheetah print butterfly cap for the last of it.


More of my quiet Wales adventures and more winter hats to come! Are you an adventurous holiday maker or more into relaxation and inspiration like me?
SHARE:

Tuesday, 19 January 2016

My take on a 1940s "Small Chic Beret"

The internet abounds with ridiculously gorgeous images of vintage hats. I could spend hours drooling over them (and sometimes do) and dreaming of being able to make something so beautiful. Generally when I see a fabulous vintage hat, I add it to my mental "I want to make this" list. Hats rarely make the transition from this list into reality, but here is one that did.


This design was inspired by the so-called "Small Chic Beret" illustration from McCalls Needlework magazine (Winter 1942-1943) which was scanned and shared by Brittany over at Vavoom Vintage last year.


One of the reasons that this hat was made, unlike so many others, was that as soon as I saw the illustration, I thought of this wool fabric I had bought from the Trefriw Woollen Mills on my last trip to Wales. (Newsletter subscribers saw a preview of this in the very first email!)


While the original would have been a flat pattern hat to be sewn from fabric, mine has the fabric draped over a blocked wool felt button shape. The other main difference is of course the feather, which here is made from wool felt again. I played around with some alternate angles for the hat, but in the end decided that McCalls knew what they were doing, and kept to this orientation.


There's that Selling Millinery supplement again! And my new-to-me Dobbs hat box, which was a Christmas or Birthday present from my mum.

Speaking of both the Trefriw Woollen Mills and my mum - big news! My family and I will be going to Wales again this year to visit! (My mum. But also hopefully the Mill.) We're a bit anxious about Teacup's first international flight and potential jet lag, but also very excited about the holiday and all the exciting things we will get to do. The trip should be a mix of adventurous activities for my husband, quiet wandering around nice villages and sitting in cafes and parks for me and Teacup, and toddler-friendly activities for all of us. Teacup and I will be staying on an extra week with my mum, when we'll get to do the things we love, like Woollen Mills and historic houses and shopping.

If you have any suggestions for great things to do in North Wales or the surrounding area, I'd love to hear them!
SHARE:

Tuesday, 11 August 2015

More Winter Felts and 1940s-Style Turbans


Today is going to be a picture-heavy post focusing on some hats I've been making and finally taking photos of recently.


If you follow me on Instagram, or subscribe to the newsletter, you might be getting sick of this 1940s-reproduction turban made from wool felt, because I just LOVE it, so I keep sharing it! (Oh, and you can custom order your own in your size and any colour.)


This was the first version of this style of turban, and it turned out a bit small for me, and also for my model, but you get the idea!


This one is made from thermofelt, which I've talked about before. It has the benefit of the bounce-back qualities of that material, but being thinner, it has a less full and lush feel, I think.


Away from specifically vintage styles, I still think this winter felt hat with faux fur trim has a vintage feel to it. Maybe it's just the way it softly frames the face.


Jasmine just managed to turn up in coats that matched the colours of the hats I brought to the photoshoot!


I shared another hat made from this same vintage hat block earlier, but I played with faux fur trim on this one for a different look.
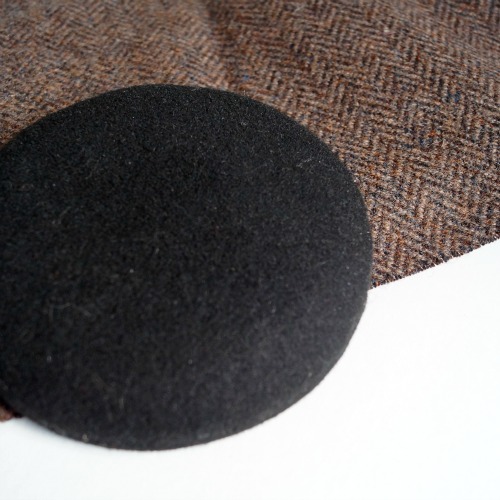

My favourite thing about it is how it looks like completely fur from one side, and almost all felt from the other side.


I think I will be continuing to experiment with this block. I think I still haven't worked it out to my satisfaction.


This purple fur beret is also from a block you've seen before, and, again, I'm still working it out. It is a little large and I need to work out how to make that still work for me. Still, I love the colour of this one. I love bright purple in winter outfits.


What is your favourite colour and style of hat for winter? Leave me a comment and let me know! I love finding out what people like to wear.

To see sneak peeks of my new hats as I'm making and photographing them, as well as other behind-the-scenes info and useful hat-related links, sign up to the newsletter.
SHARE:
Blogger Template Created by pipdig