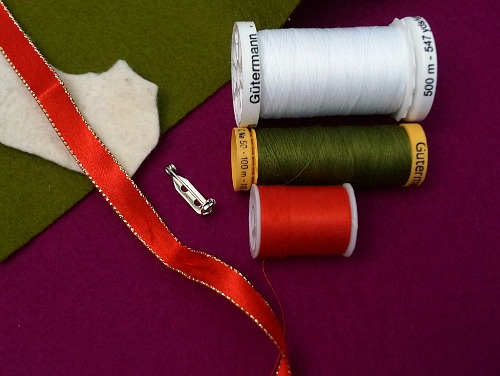
So let's get into it. You will need:
- Green felt, approx. 10m by 10cm, can be in smaller scraps (I used 100% wool, 1mm thick)
- White felt, a small scrap of a few square cm (I used some hand-felted wool from a friend, about 1-2mm thick but varied)
- Red ribbon, approx. 15cm long (mine is gold-edged, 1cm wide, some kind of cheap craft ribbon from my stash)
- Matching threads
- Needle
- Brooch clasp
- Sharp scissors
Skills required
- Hand stitching. You don't need any particular "stitch", you are just going back and forth through the materials to hold them in place, but you need to be able to thread a needle and tie a knot in the end and so on. (Having said all that, you can just use glue if you like!
- Um...that's it!
(Let me explain right here about my background colour. I wanted a solid background but not white, so that the white felt would show up. I used this fuchsia pink felt, but its colour showed up totally differently in different photos! Oops!)
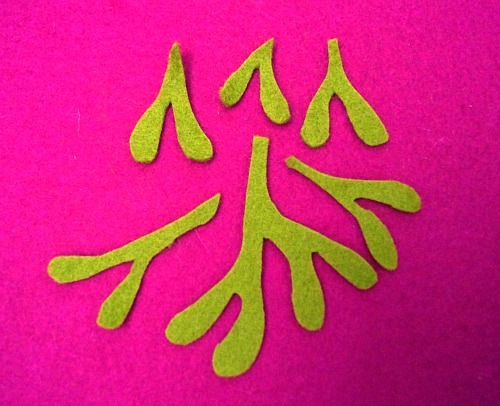
Cut out your mistletoe leaves. Here is a picture of mine. I cut freehand based on looking up images of mistletoe. I had to make sure I searched for real mistletoe, since a lot of results were clip art and illustrations, and a lot were also actually holly!
But if you aren't confident at that, fear not! I turned mine into a pattern for you. Literally. I turned that image into a pattern rather than drawing one. I'm not sure if that's lazy or efficient. Print this out at approximately one quarter of an A4 page. Cut each shape out. I recommend tracing around with an erasable pen as the easiest way, then cutting out. This also allows you to get an efficient layout on your felt.
Thread your needle with green thread and knot the end.
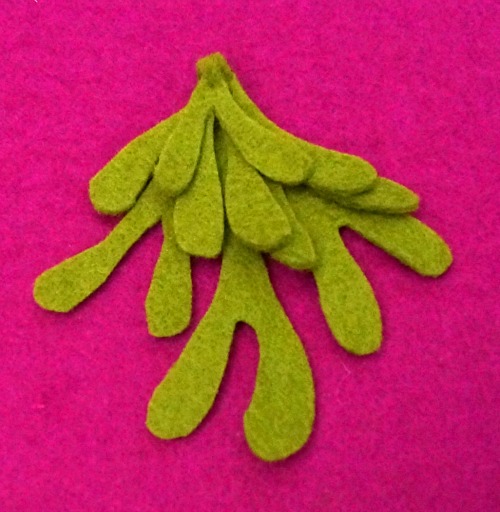
That big piece is your base. Layer the others on top and sew them on, using a couple of stitches through the top of each one. Add the bigger pieces first, then the smaller ones on top.
Cut out 8 small circles from the white felt. If they don't look round enough, rub them around between your fingers a bit as well. Place them on your mistletoe in pairs, with each pair located at the top of a pair of leaves. Thread your needle with white thread and knot the end.
Stitch the berries on using the white thread and a stitch or two per berry. Start and finish the thread again for each pair so you don't have a long stitch between them at the back.
Take your ribbon and cut into a longer and shorter length (about 10cm and 5cm). Cut the longer piece on an angle at each end. Thread your needle with red thread and knot the end.
Fold the longer piece into two loops and two ends, the loops and ends of the bow.
Stitch these folds in place with a few stitches.
Take the shorter piece and wrap it around the centre of your bow, and stitch that in place at the back of the bow.
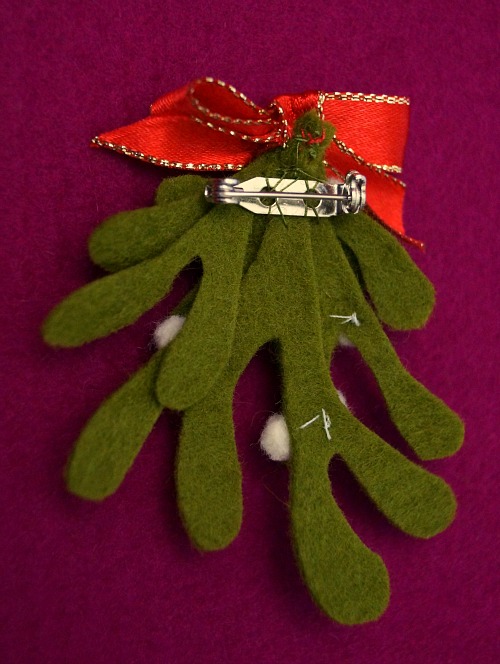
Stitch the bow to the top of your bunch of mistletoe.
Turn your brooch over. Thread your needle again (I used green but it doesn't really matter for this part) and get your brooch clasp. Sew the clasp on to the upper central part of your felt.
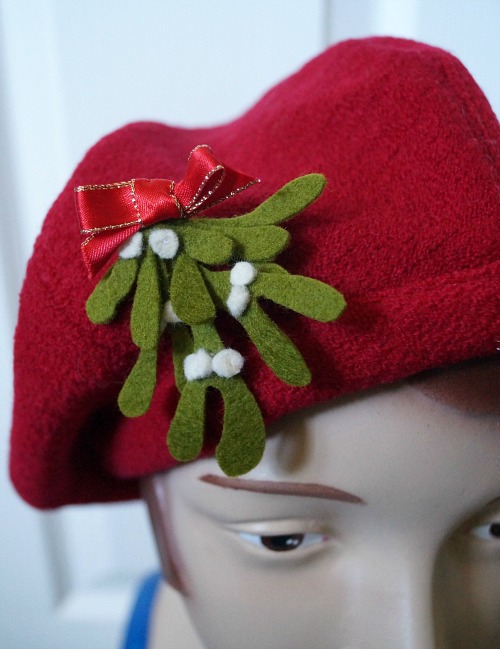
Clip your brooch on! Wear it as a brooch or trim a hat with it. Or a bag! Or...whatever!
Suggested variations:
- Use small white beads instead of felt for the berries
- Add a tiny bell! I collect the ones from Lindt bunnies and so on, so I have them on hand for crafts
- Use an alligator clip instead and pin straight into your hair
- Make a cute felt bow instead using thin red felt
- Change it up completely by cutting holly leaves instead and making red berries
I know that some people like Christmas preparations to wait until closer to the day itself, but I'm not one of them. There have been a lot of Christmas songs playing around here, and it honestly has put me in the best mood! (And it inspires my Christmas creating too)
I hope you enjoyed the tutorial. If you use it, I'd love to see what you make :)





I love it! I'll try to find some time to make one for myself, as I really do love a good brooch :) Thanks for the tutorial!
ReplyDeleteYou are welcome and I hope to see the results if you make one!
DeleteThis is great! I've got some felt laying around to give this a go and I'd love to do a holly brooch a well!
ReplyDeleteThank you! The more I think about it the more I want to do a holly one myself!
DeleteThat's a fun idea! And if you put in on your hat, you're always standing under the mistletoe - great if you want lots of people to kiss you. ;)
ReplyDeleteIt may not be for everyone, but I like to give people the option :)
DeleteYou're awesome, dear Tanith. Huge thanks for sharing this creative, timelessly beautiful felt mistletoe tutorial with us and also for helping to spread the good word about 2015's Vintage Secret Santa. I appreciate it immensely and am so happy that you're taking part again. Yippee!!!!!
ReplyDeleteTons of hugs,
♥ Jessica
You are welcome on all counts! :)
DeleteGreat tutorial and thanks for providing a leaf template. I am really bad at drawing so a pattern is the way forward for me!
ReplyDeleteHaha you are welcome!
DeleteI love this ssooo sooo much! I fell for felt brooches after creating my own flower one, and I think this one is so darling! I have to get some more felt to make it, but it is definitely on my to-do list! It's so sweet! Thank you so much for sharing Tanith! ❤
ReplyDeletexox,
bonita of Lavender & Twill
Thank you! Felt is just the best to work with. I love that it is such a classic material, and you don't have to hem it. What a combo :) Between us we can populate the world with felt brooches!
Delete